The construction of the custom development environment |
The Java development kit (JDK), which contains the Java runtime environment (JRE), the JDK version supported by custom development project of the product is 1.8 and above. Java development environment (IDE) tools, at present the most popular development tool is the Eclipse.
Configuring environment variable after installing the JDK, computer - > properties - > advanced system settings - > advance - > environment variable - > system variable- > new JAVA_HOME variable, the variable's value is filled in the installation directory of JDK .
Note:
The configuration of SuperMap iPortal license please see: lincense configuration introduction.
SuperMap iPortal 8C SP1 or updated version, is not dependent on SuperMap Objects in Java, but the operation license needs to rely on the dynamic library file HASPJava.all (HASPJava_x64.dll for 64-bit).
You can configure the following environment variables using the iPortal's own dynamic library:
%SuperMap iPortal_HOME%,refers to installation directory of SuperMap iPortal, then inputting like %SuperMap iPortal_HOME%\support\SuperMap_License after the the variable value of Path.
Taking the Custom_Portal custom project under %SuperMap iPortal_HOME%\samples\code\CustomPortal deirectory as an example, to introduce the steps of configuring project in detail.
The first step: Finding the % SuperMap iPortal_HOME % \ samples \ code \ CustomPortal directory, the directory has a Custom_Portal project, as shown in the figure below:
The second step: Copying all folders under the %SuperMap iPortal_HOME%\webapps\iportal directory (not including lib folder and the cache folder under the %SuperMap iPortal_HOME%\webapps\iportal\WEB-INF directory) to the % SuperMap iPortal_HOME%\samples\code\CustomPortal\Custom_Portal\WebContent directory, combining them with the existing folders. Note, you can't overwrite the existing file with the same name.
The third step: Finding the .jar file named iportal-all-${version}-${date} under the %SuperMap iPortal_HOME%\webapps\iportal\WEB-INF\lib directory, copy it into %SuperMap iPortal_HOME%\samples\code\ directory, copy the staticFiles and templates two folders of iportal-all-${version}-${date}.jar file into %SuperMap iPortal_HOME%\samples\code\CustomPortal\Custom_Portal\WebContent\WEB-INF\classes directory, combining them with the existing folders, then deleting the just copied staticFiles and templates two folders of iportal-all-${version}-${date}.jar file.
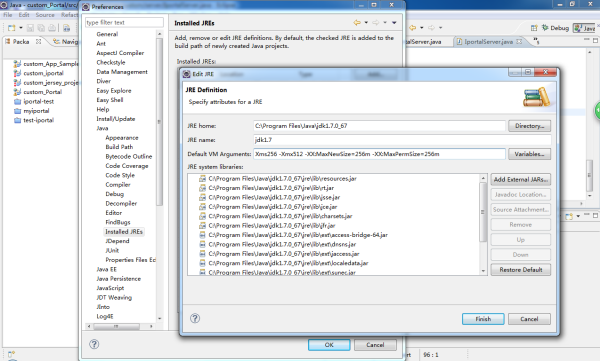
The fourth step: Installing Eclipse, after installing, starting Eclipse, configuring Eclipse's JRE, in turn, selecting Window> Preferences, selecting Java and expending in on the left side menu of the window corresponding to Preferences, selecting Installed JREs, clicking on the add button at the right window, selecting standard vm in the Add JRE window, then clicking the Next, as shown in the figure below, clicking Finish.
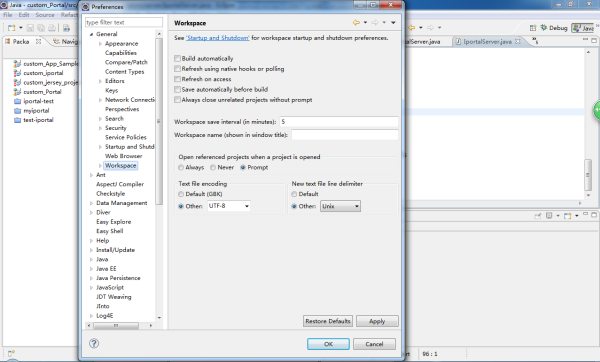
The fifth step: Selecting Window > Preferences, selecting General and expending in on the left side menu of the window corresponding to Preferences, selecting Workspace, checking Other under the Text file encoding in right menu, selecting UTF-8, as the same, checking Other under the Text file line delimiter, selecting Unix, as shown in the figure below, clicking "OK".
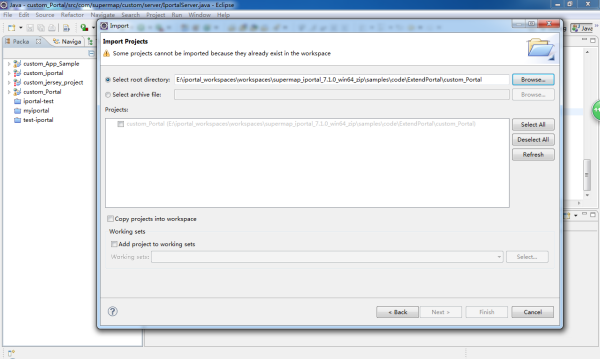
The sixth step: Introducing the custom development projects in Eclipse, clicking File menu of Eclipse, then clicking Import, selecting General and expending in Import tab, clicking Existing Projects into Workspace, then clicking Next, finding the Custom_Portal project in the %SuperMap iPortal_HOME%\samples\code\CustomPortal\ directory, as shown in the figure below, clicking Finish, importing the project is completed.
The seventh step: In Eclipse, right clicking Custom_Portal project, selecting Build Path> Configure Build Path, clicking Libraries tab in the pop-up dialog box, dragging the scroll bar, selecting JRE System Library, then clicking on the Edit button on the right, selecting the JDK version configured in local machine, as shown in the figure below:
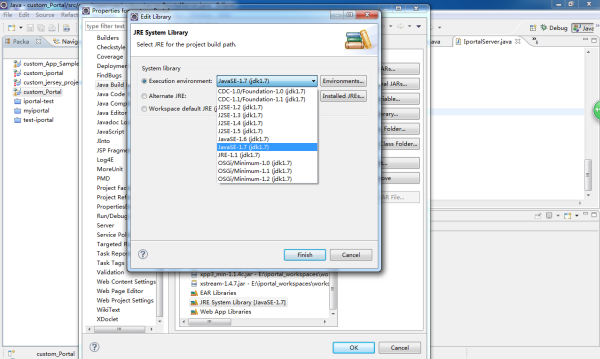
Then, clicking Finish.
The eighth step: Configuring dependent jar package. In Eclipse, right clicking Custom_Portal project, selecting Build Path> Configure Build Path, clicking Libraries tab in the pop-up dialog box, clicking Add External JARs to add following jar:
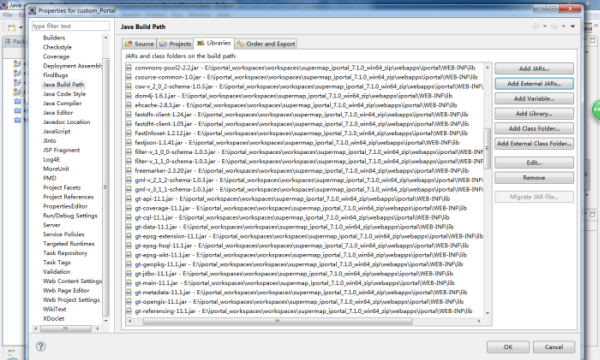
Then, clicking OK.
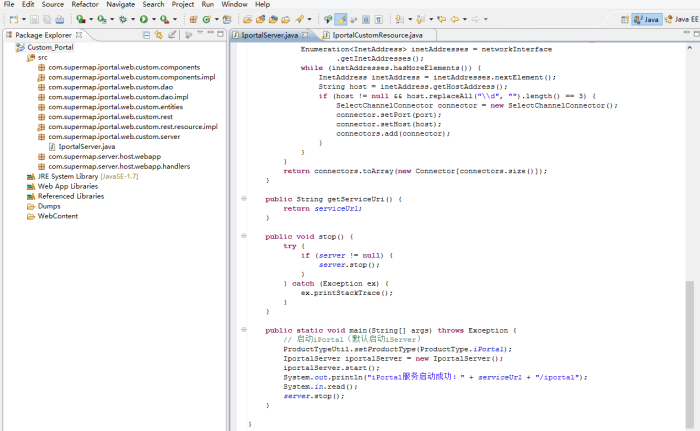
The ninth step: In Eclipse, opening the IportalServer.java class(under src > com.supermap.iportal.web.custom.server package) under Custom_Portal project, as shown in the figure below:
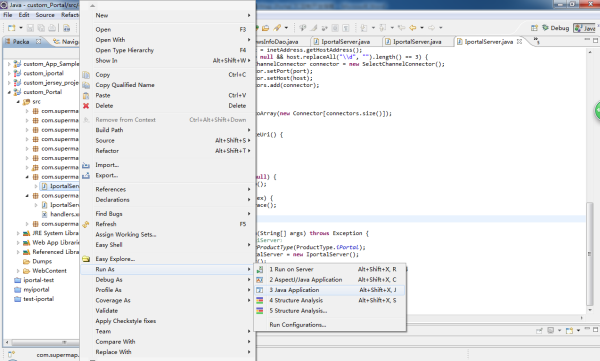
Right clicking the IportalServer.java class, then selecting Run as > Java Application , the service is started successfully.
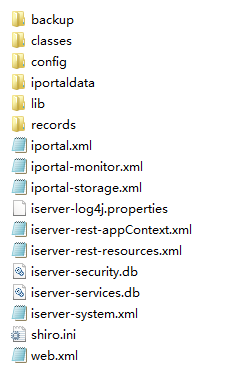
After finishing configuring project, it will generate required files in the Custom_Portal\WebContent\WEB-INF directory, as shown in the figure below: